Alex - Technical Design |
Below is how I as a media production practitioner have acquired new technical skills that are revivent to documentary film making.
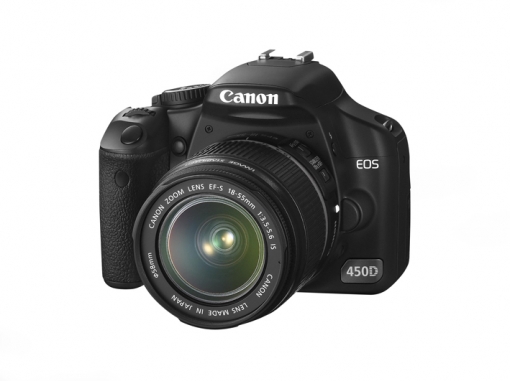
Canon 450D SLR
The canon 450D is a 12.2-megapixel digital single-lens reflex camera that is part of the Canon EOS line of cameras. It is one of their entry level cameras however it is still a respectable and able camera in photojournalism.
We learnt how there is two modes to the camera, the basic mode and the creative mode.
· Creative mode
P: Program - Camera still in automatic modes, but unlocks features of the creative mode. Camera still sets aperture and exposure time with no input needed.
Tv: Shutter priority - Camera selects aperture based on user defined shutter speed/ exposure time.
Av: Aperture priority - Camera selects shutter speed based on user defined aperture size.
M: Manual exposure - User defines both shutter speed and aperture size.
A-Dep: Automatic depth of field - Camera selects both aperture and shutter speed in an attempt to have the greatest depth of field, and have everything in the viewfinder in focus.
· Basic Mode
These modes do all the work for you depending on the situation you tell the camera you want. They will auto control things like shutter speed, aperture size, depth of field.
Portrait - Landscape - Close up - Sport - Night portrait - Flash off
ISO: 100 Spain (Best Contrast)
400 Britian/Cloudy
1600 Dawn or Dust (Pixilates)
TTL - Through the lence light metre.
Contrast - The difference between black and white.
When flash is up, shutter goes faster and into auto.
Picture styles:
Standard – For everyday situtions
Portait – Close ups of faces
Landscape – Longshot, brings out the best in certain colours
Monochrome – Black and white
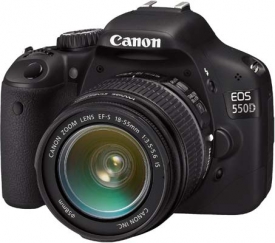
Canon 550D SLR
The Canon EOS 550D is an 18.0 megapixle digital single-lens reflex camera It continues the entry level digital SLR camera series of Canon, and is currently placed by Canon as the successor model to the 500D, and has been superseded by the EOS 600D.
With this camera we were introduced to how it is a better camera in most ways with photography and that the camera can film full HD footage.
CA: Creative Auto Mode - With the 550D you get the new option of CA mode; this is another creative mode option available with this camera. With Creative Auto you can adjust flash, brightness, sharpness, and Picture Style, but something else with this mode you can do is 1 meter photography. With this mode you can take images where by the camera will help with the depth of field, this only works with a depth of field of about 1 meter but it means that if you are focusing on a picture fame on a table but you want the table and wall in focus as well you can tell the camera to take some of pixies it has placed on your focused image and then plant them onto the other areas so you get a more balanced focus look.
HD Filming: The EOS 550D doesn't offer the same streamlined ergonomics in video capture mode as it does when taking still images, but its video implementation is a lot more satisfying than some previous DSLRs.
The 550D offers progressive HD video capture at 1920 x 1080 pixels (1080p) at 30, 25 or 24 frames per second, or 1280 x 720 pixels (720p) at 60 or 50 frames per second (available frame rates differ depending on whether you have the camera set to NTSC for the Americas or PAL for Europe). The built-in internal microphone captures monaural audio, but there is also a socket for a 3.5mm external microphone that allows recording of stereo sound. When recording video in low light and using higher sensitivities the image gets noisier. This is of course what you would expect, but the 550D does quite well in this respect, and due to the smaller image sizes in video mode compared to stills the noise never becomes really intrusive.
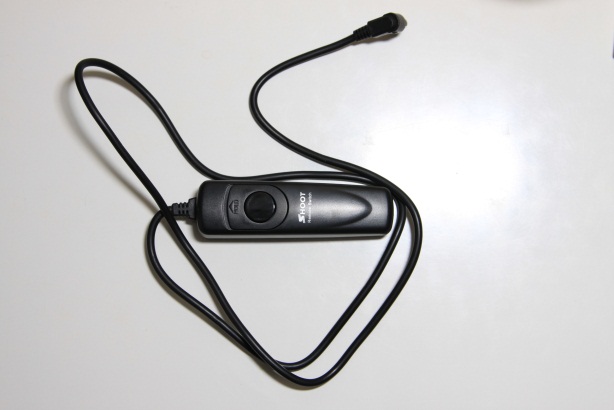
SLR remote cord
http://www.buyincoins.com/images/review/1299069197-IMG_3166.JPG
Used to stop camera shake, very useful and effective when doing show shutter speed shots.
 |  |
Speedlite
Speedlite is a SLR photographic flash mechanism used on Canon's SLR cameras. It is an attachment that hocks onto the top of the camera to enhance and improve on the current standard flash that is already built into the camera. It has many settings and modes available to improve lighting when shoting at night or in dark locations that require light.

RAW Editing
When it came to editing my images for my photo essay I used Photoshop to edit while using bridge as a viewing platform before and after edit. I found that I only really used certain editing tools within the Photoshop raw editing application. These were mainly exposure, clarity, vibrance and saturation.
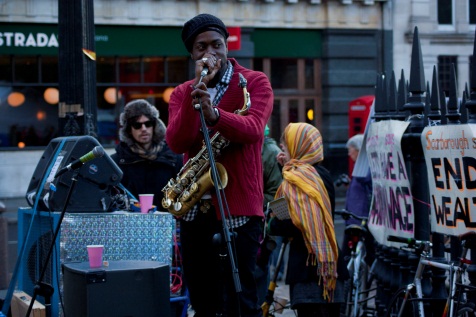
Here is one of the raw images from my photo essay that I edited in photo shop. We can see the difference with the images before and after I edit them. With this image I had quite a lot to do as when I originally took the image I underexposed it when shooting on manual; this was a mistake that I needed to correct in editing. So I played around with the exposure levels to bring some more light into the picture, also I did a little tweaking with the fill light and brightness options available however did not do too much as it started to make the lighting of the picture look to fake. Also with this image I sore how nice the reds of the gentlemen’s jumper and the yellows and oranges of the lady’s scarf had come out, but to enhance this I played around with the vibrance and saturation options to bring even more colour to these areas. This worked really well especially with the lady’s scarf as changing the saturation and vibrance also brought out the saxophones colour beautifully. Overall I learnt how much you can change and correct your images when shooting in raw, that if you make a mistake when taking the picture then you always have raw editing as a backup to fix it in editing.
 |  |
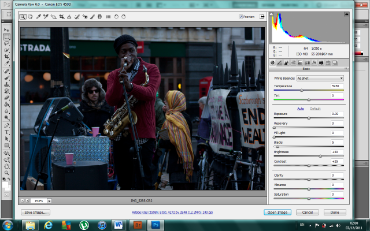
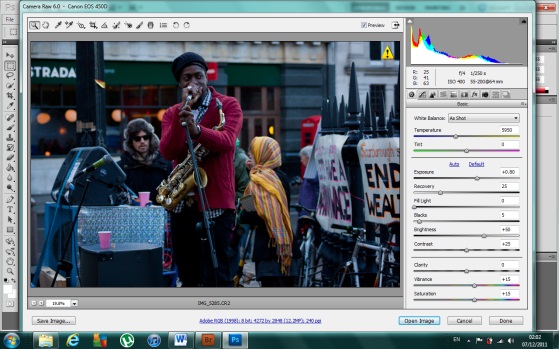
Here is some screen shots of where I am on Photoshop editing the picture in raw. Photoshop comes up with these separate application tab when you edit in raw and it can only be used with raw images. When you are finished editing your image you can save and go back into the normal tab of Photoshop with your edited picture and edit it any further using the standard editing tools available on the software.
 |  |